At the Nebraska sew-in on May 2nd Jay showed me how to tie a quilt as he was taught by his grandmother. As with all quilting, we know there is more than one way to do things but I hope these photos and links at the end will help YOU on your way to tying a HeartStrings quilt of your own!
How to Tie a HeartStrings Quilt – PDF file
Julia and Sheree tested the cuddle factor for us.

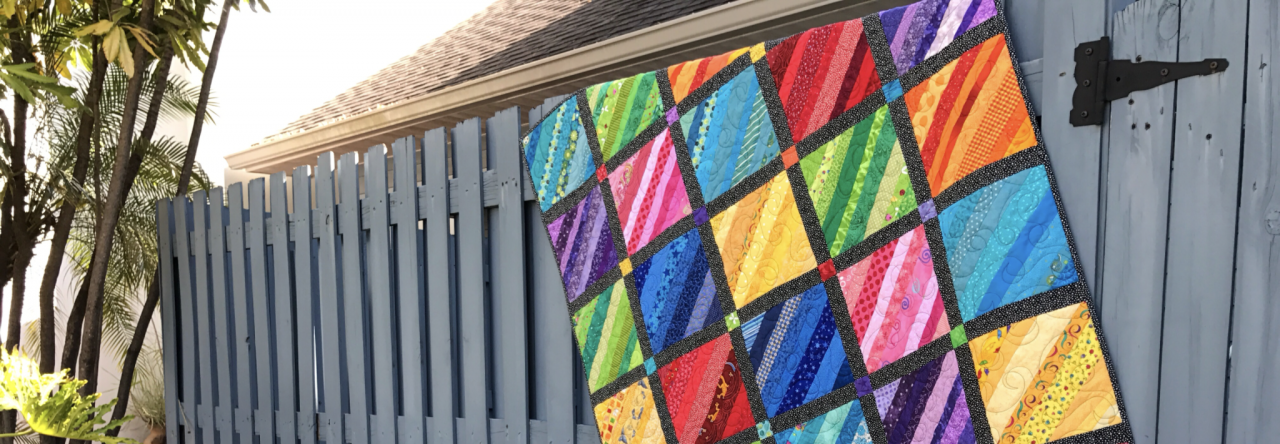
I’m not sure if it was the tying or the blanket but this quilt was one of the most cuddly quilts I’d ever helped make and I loved it!
I like to tie my quilts using a surgeon’s knot … here’s a video I found online demonstrating it.
How to tie a surgeon’s knot – video

OK… I get it! (MARY CAN TELL i AM ALL OVER HER WEBSITE HERE…LEARNING ALOT. I think this is one of the better sites for learning…again, thanks. Getting all the pix uploaded, and writing out all the instructions, I cannot even begin to imagine such a thing,
LikeLike
mary – this is exactly what my grandma did on the farm in the northwoods back..well lets just 40plus plus yrs ago 🙂 So Thanks for the reminder.
***I have a super big new savalation army in our wee village, so I will keep a watch for blankets for you.
LikeLike
Pingback: How to Tie a HeartStrings Quilt
Fabulous instructions!!!!
Thank you so much.
Marie
LikeLike
Doing a heartstring quilt has always been on my to do list. Everybody that has done one always have looked nice. Tying a quilt is somthing I’ve also wanted to learn. This has been the best site I have found. Jay has made it seem so simple and easy to do. The best part is understanding exactly what he is doing. I’m placing this in my favorites for safe keeping and going to try this. Thank you all for having this on your site. I know I can do this. lol Thanks
LikeLike
this is great. I can see that tying quilts is going to be the less time consuming way to quilt the quilts we are going to make at the heartstring sew in I am organising for the local childrens hospice.
LikeLike
Thank you so much for putting this together! It is so informative and very well done. I just finished tying (I usually quilt with my machine) my first string quilt and I loved the process. I plan to tie my string quilts now so I can finish them faster.
LikeLike
I am so glad to see a blanket recycled as the innards of a quilt! The first quilt I ever made, while I was a poor college student in 1970 had remnants of left over fabric from clothing I had made, or things I found at the Goodwill, and the “batting” was composed of towels and a mattress pad! The quilt is still in use for lounging about on the beach at the summer cabin on Puget Sound (Washington state).
Thank you for all the wonderful patterns on here. I sew quilts for charity and I’m always looking for quick and colorful new pattern ideas.
LikeLike
Thanks so very much for such great instructions!! I am a beginner quilter and I decided to make some children quilts for Christmas and I was wondering how I was going to get them done. You came to the rescue!!
LikeLike
Thanks for the instructions! I’m a beginner and found these to be great! We still use my great-great-grandmothers quilt on our bed (over a 100 years old) and she had knots on it like these and I couldn’t figure out how she did it but these instructions worked! Thanks!
LikeLike
Pingback: Some tips for assembling blocks
Pingback: Tying quilts
Amazing Website !!! thank you so much for sharing all your work and talent. I was searching how to use the scraps in quilts , that is when I found you. I am so glad that I found you. I love quilting. My new passion and hobby it is. You explain the designs so clearly and make it sound so simple, even a newbie like me can understand. !! XOXO 🙂
LikeLike
I was trying to find out about the thread for tying a quilt. This is a beautiful quilt and I believe I will have to make one. Thank you for sharing the directions and including pictures they really help! Judy
LikeLike
WOW!!Great going Jay!learned a lot!Come on down to Texas.You can show me anytime.
LikeLike
i was tickled to see an old blanket used as the batting. that is what i use too. Quilting was about using up materials instead of throwing them out, and I enjoy that sense of thrift and frugality. That’s the beauty of quilting.
LikeLike
This is such a huge help. Thank you. I am just about finished piecing a rail fence quilt for a work colleague’s new baby and didn’t want to have to hand sew the binding. I think I will use the feather stitch on my machine. It just seems so easy and obviously quicker than hand sewing the binding.
LikeLike
Thanks, this gives me good ideas for finally using up the blocks I’ve collected in swaps & lottos. I can’t afford to send my quilts to a Longarmer anymore.
LikeLike
Pingback: Peaceful & Meditative
Thank you Mary for this wonderful, instructive page. I am a beginner at quilting
and have made many appliqued quilts and love it. But, have lots of left over
fabric. I plan to make scrap quilts for the young adult grandchildren. (Nine)
You are super — keep the ideas flowing!
LikeLike
Thanks! I made a jelly roll quilt with my granddaughter and I wanted to tie it the way my mother always tied a quilt. But, I couldn’t remember. Jay did it. We followed the steps and had very nice results. Now we are making one for my grandson, her brother!
LikeLike
Thank you for making life so much easier,for those of us which enjoy quilting,but can’t aford to have the quilt sandwiched by those that have the quilting table. Hand tieing taks me back to when my grandmother made our quilts. She used whatever string she had, actually sometimes fishing strings. I am 75 years old,so that was along time ago. I have learned to quilt in the last few years and have wondered why it took me so long to get started! Thank you Jay for your wonderful and easy to follow instruction. Marty
LikeLike
i tie all my quilts i cant afford to have them sent off to . be done..but i find it fun to do the tying… if you dont have a big table like that i found putting it together on a large bed and then pinning it.. and then i fold it and bring it out to my ironing board. and start at one end and work my way around it.. the ironing board.. lays it flat enough to do it .. and then inch it up as i get some done…
LikeLike
Our ping-pong table is going to come in very handy now!
LikeLike
Please, I beseech you —–do you have any full quilts with a matching sham.
LikeLike
For those who don’t have a really large surface to lay their quilt on, and use a bed…..Get one of those science fair board that the middle schoolers use (preferably the foam core type). Try your local craft store. It works really great to keep things flat and especially to keep from pinning your quilt to the bedspread !
LikeLike
I love everything about this. The gorgeous quilt and the clever way you tied it. Thanks for posting this.
LikeLike