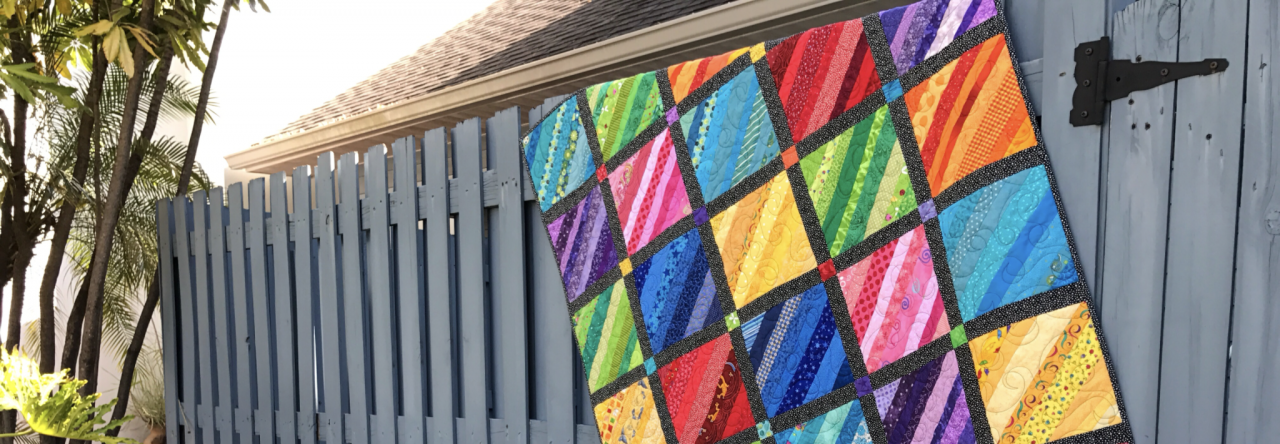
Hi Mary i want you to know how i like your pillowcase pattern i have used it for cancer kids and also with soilders and have lots of complements on the way you make it some people don’t make the french seam and leave the raw edge and i think it make a nicer finish and more durable one thanks i also have used other patterns to make some quilts for kids that they give to policeman fireman and hospitals the easy stripe quilt make a really nice quilt and easy to make thanks i really like your web site too marilyn
Does anyone know who first came up with this pattern? I’ve been making these for a couple years now…everyone got pillowcases in their favorite prints a couple Christmas’s ago. I’d really like to give credit to who came up with this idea.
Thanks for the step by stpe tutorial. It helps refresh my mind.
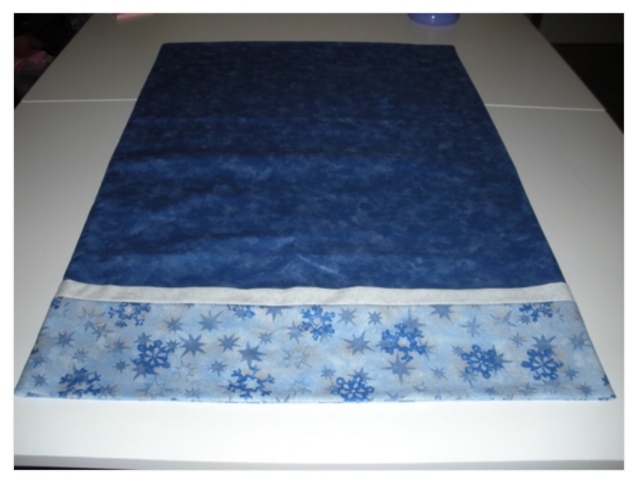
i saw this pillowcase explained by janey donaldson a few years ago when she had her quilt show on tv. such a nice lady. there is also a university website with this pattern. i’ve made so many of these, and so easy. i use my serger for all steps. i recently saw this pattern called a “burrito” pillowcase ’cause of the way you enclose the body of the case. i have been making p. linus quilts since 2004…..i love the strip quilts…again, i use my serger and do the kaye wood idea of quilt as you go…..
The quilting group I belong to: Sun City Quilters, Georgetown,Texas has been making quilts for wounded soldiers coming back from Iraq and Afganistan for the past 5 years. We have distrubited more than 500 quilts to these brave men and women at Brooks Army Medical Center, San Antonio, Darnall Army Medical Center and Warriors In Transition Unit, Ft. Hood,Killeen,Texas and the Womens Trauma Recovery Center, VA Hospital, Temple,Texas.
We also make a pillow case to store the quilt in. The hot dog method of making them has been a lifesaver. We have workdays and form an asembly line, with cutters, and sewers using their sergers. On our last workday we made 40.
I have to agree your tutortial is very user friendly.
Thanks for providing it.
Andrea
I have been trying to figure this thing out with other tutorials on the internet and yours is the first one that has made sense to me and that I have been able to use! Thank you so much for posting such a great, easily understood tutorial. Now, I am off to make more pillowcases! Michelle in Texas
Great tutorial — I’d been reading others and unable to follow what they were talking about when it came to that fold/roll technique, but your pictures and clear instruction made the difference!
I have seen these direction before and they were clear as mud. These I understand.
Now, I wll make some as soon as I can move around the sewing room again. I broke my foot in 2 places this morning. So for now back to the knitting.
Pat
I just finished my first pillowcase for my granddaughter. I have to thank you for a great pattern, and yes, it was easy. The directions sounded confusing but just go step by step and you’ve got a beautiful pillowcase. Thank you~~~
Our church has made 68 pillowcases for Iraq but the contact person I had has not responded. Do you by any chance know and address that we can send them to?
Thank you
Sandy Cox
Hi Mary, I’m a newbie on your wonderful website. These “burrito” or “hotdog” pillowcase methods are pure genius for sewers! I’ve made 25 so far, 7 going to childrens’ hospitals for kids with cancer. I plan to do this every year. I find beautiful, cheerful fabric on Hancock-Paducah’s remnant table. It’s a great way to help those in need of a little cheer.
I made this pillowcase about 4 years ago, but the pattern I got out of the file today didn’t make much sense to me and I knew that Kay would have some help for me. I’m looking forward to making a few for “humanitarian care” Thanks!
Thank you for your instructions. My son is a wounded warrior and needed something to occupy time. I sent him a sewing machine, fellow soldiers got involved in trying to make pillowcases. The instructions are easy to follow and the guys are having a blast sewing. Luckily one of the recreational therapist knows how to sew and they are also learning how to wind bobbins, change needles and thread the machine.
So in the fifth picture, when you have pinned it all together, the layers caught in the pins, in order, are 1 layer of the cuff, the contrasting band, 1 (or 2?) layer(s) of the body fabric?, and then a second layer of the cuff. Omitting the middle fan-folded fabric of the body.
Is this accurate?
Have been using this pillowcase pattern for a year or so. Sure is easier than some methods I have seen. I agree directions sound confusing but like one tutorial I read said to just follow the instructions exactly as written implying do not think and just do it.
I’ve made a ton of these pillow cases and have found that I like to use 12″ for the cuff instead of the 9″. It makes it so much easier to turn. I also think it is a bit more elegant, especially if I am making King Sized cases.
Hi heard about you from Mrs. Judy where would I send my pillow cases for the deployed military. I am from a military background and know how much a little piece of home makes a huge difference ! and every night to lay your head down on a piece of home that was made by loving hands means the world to them. I am also going to make some for the Children’s Hospital in Boston Mass. when I was 6 I had open heart surgery there. now I am 48 and live back in Louisiana and want to send that special touch to sick kids. I know first hand how that would have made me feel and want to put a smile on their faces !

Pingback: Done and done « Rosewillow’s Unfinished Business
Hi Mary i want you to know how i like your pillowcase pattern i have used it for cancer kids and also with soilders and have lots of complements on the way you make it some people don’t make the french seam and leave the raw edge and i think it make a nicer finish and more durable one thanks i also have used other patterns to make some quilts for kids that they give to policeman fireman and hospitals the easy stripe quilt make a really nice quilt and easy to make thanks i really like your web site too marilyn
LikeLike
Pingback: Pillowcases for Christmas (Week 50 Stash Report) « Rosewillow’s Unfinished Business
Pingback: Calling It Quilts » Blog Archive » Wonderful tutorial for pillowcases
Thanks for the tutorial. My first pillowcase turned out great!
LikeLike
Thank you for the pillow case tutorial,I have to try this one and I also found a quilt on your web site that I am planning on making.Trish
LikeLike
Got a bunch cut and ready to sew up !! Thanks for showing us how to make them!!
bp
LikeLike
Great tutorial as usual!! Thanks. Do you have dimensions for a king-size pillowcase? I’ve had a request for one. Thanks, Susy
LikeLike
Does anyone know who first came up with this pattern? I’ve been making these for a couple years now…everyone got pillowcases in their favorite prints a couple Christmas’s ago. I’d really like to give credit to who came up with this idea.
Thanks for the step by stpe tutorial. It helps refresh my mind.
Sue
LikeLike
i saw this pillowcase explained by janey donaldson a few years ago when she had her quilt show on tv. such a nice lady. there is also a university website with this pattern. i’ve made so many of these, and so easy. i use my serger for all steps. i recently saw this pattern called a “burrito” pillowcase ’cause of the way you enclose the body of the case. i have been making p. linus quilts since 2004…..i love the strip quilts…again, i use my serger and do the kaye wood idea of quilt as you go…..
pat whitley
LikeLike
The quilting group I belong to: Sun City Quilters, Georgetown,Texas has been making quilts for wounded soldiers coming back from Iraq and Afganistan for the past 5 years. We have distrubited more than 500 quilts to these brave men and women at Brooks Army Medical Center, San Antonio, Darnall Army Medical Center and Warriors In Transition Unit, Ft. Hood,Killeen,Texas and the Womens Trauma Recovery Center, VA Hospital, Temple,Texas.
We also make a pillow case to store the quilt in. The hot dog method of making them has been a lifesaver. We have workdays and form an asembly line, with cutters, and sewers using their sergers. On our last workday we made 40.
I have to agree your tutortial is very user friendly.
Thanks for providing it.
Andrea
LikeLike
Pingback: Get ready for a new project!
I have been trying to figure this thing out with other tutorials on the internet and yours is the first one that has made sense to me and that I have been able to use! Thank you so much for posting such a great, easily understood tutorial. Now, I am off to make more pillowcases! Michelle in Texas
LikeLike
Thank you so much for the tutorial. I really needed to see the photos to understand how it works.
LikeLike
Great tutorial — I’d been reading others and unable to follow what they were talking about when it came to that fold/roll technique, but your pictures and clear instruction made the difference!
LikeLike
I have seen these direction before and they were clear as mud. These I understand.
Now, I wll make some as soon as I can move around the sewing room again. I broke my foot in 2 places this morning. So for now back to the knitting.
Pat
LikeLike
Pingback: Crazy for the Country » Blog Archive » Make your own pillowcase
What an easy pattern, and I have just gotten my go. Thank you for sharing your directions.
LikeLike
I just finished my first pillowcase for my granddaughter. I have to thank you for a great pattern, and yes, it was easy. The directions sounded confusing but just go step by step and you’ve got a beautiful pillowcase. Thank you~~~
LikeLike
Our church has made 68 pillowcases for Iraq but the contact person I had has not responded. Do you by any chance know and address that we can send them to?
Thank you
Sandy Cox
LikeLike
Pingback: Pillowcases are fast and fun | Needlearts … and beyond
I have seen other tutes for these cases and yours is so much better.
LikeLike
This was really helpful!
LikeLike
Hi Mary, I’m a newbie on your wonderful website. These “burrito” or “hotdog” pillowcase methods are pure genius for sewers! I’ve made 25 so far, 7 going to childrens’ hospitals for kids with cancer. I plan to do this every year. I find beautiful, cheerful fabric on Hancock-Paducah’s remnant table. It’s a great way to help those in need of a little cheer.
LikeLike
I don’t understand this at all.
LikeLike
I’m a little slow, but I’ve finally got it! Thanks, Mary.
LikeLike
I am a new to sewing and was wondering what width of fabric is to be used for these cases. Thanks. My daughter is making this as a 4H project.
LikeLike
wonderful site. Lots of good instruction. Thank you for sharing. Peggy
LikeLike
Pingback: Pillowcase instruction | Shaadui
Thank you! I enjoy the pillow case. I have made 4 sets. Next I’m going to try string quilt. Wish me luck first one.
LikeLike
I made this pillowcase about 4 years ago, but the pattern I got out of the file today didn’t make much sense to me and I knew that Kay would have some help for me. I’m looking forward to making a few for “humanitarian care” Thanks!
LikeLike
Thank you for your instructions. My son is a wounded warrior and needed something to occupy time. I sent him a sewing machine, fellow soldiers got involved in trying to make pillowcases. The instructions are easy to follow and the guys are having a blast sewing. Luckily one of the recreational therapist knows how to sew and they are also learning how to wind bobbins, change needles and thread the machine.
LikeLike
So in the fifth picture, when you have pinned it all together, the layers caught in the pins, in order, are 1 layer of the cuff, the contrasting band, 1 (or 2?) layer(s) of the body fabric?, and then a second layer of the cuff. Omitting the middle fan-folded fabric of the body.
Is this accurate?
Thanks!
LikeLike
I started making these pillowcases and already have 6 sets made. So easy and each one is prettier than the last one!! Great instructions…
LikeLike
Do you know who might sell pillow cases to store handmade quilts in
LikeLike
Have been using this pillowcase pattern for a year or so. Sure is easier than some methods I have seen. I agree directions sound confusing but like one tutorial I read said to just follow the instructions exactly as written implying do not think and just do it.
LikeLike
I’ve made a ton of these pillow cases and have found that I like to use 12″ for the cuff instead of the 9″. It makes it so much easier to turn. I also think it is a bit more elegant, especially if I am making King Sized cases.
LikeLike
Hi heard about you from Mrs. Judy where would I send my pillow cases for the deployed military. I am from a military background and know how much a little piece of home makes a huge difference ! and every night to lay your head down on a piece of home that was made by loving hands means the world to them. I am also going to make some for the Children’s Hospital in Boston Mass. when I was 6 I had open heart surgery there. now I am 48 and live back in Louisiana and want to send that special touch to sick kids. I know first hand how that would have made me feel and want to put a smile on their faces !
LikeLike